In this guide, I’ve addressed many of the questions you might have about Masterbuilt 560 mods. Drawing from my experience, I’ve delved into some of the most frequently asked topics, such as:
- Masterbuilt 560 firebox mod
- Vent modifications for improved air control
- Masterbuilt charcoal grate mod
- The Masterbuilt 560 front shelf
- Essential accessories and more
These mods have enhanced my Masterbuilt 560 experience. I’m confident they’ll benefit yours as well…;
Incase you are looking for Masterbuilt 1050 Mods? Check Here..
- Masterbuilt 560 Mods (Different Methods)
- Mod 1: Firebox Upgrade
- Mod 2: Vent Modifications for Air Control
- Mod 3: Water Pan Modifications
- Mod 4: Manifold Cover/Drip Pan
- Mod 5: Masterbuilt Charcoal Grate Modification
- Mod 6: Masterbuilt 560 Griddle Shroud Modification
- Mod 7: Masterbuilt 560 Front Shelf Enhancement
- # Discover a Variety of Masterbuilt 560 Accessories Right Here.
- # LSS Masterbuilt 560 Modification Kit.
- # Frequently Asked Questions About Masterbuilt 560
Don’t miss out on my other insights:
-Explore a comprehensive list of 12+ top modifications for various grills, smokers, and cookers.
-Want to know how to clean the Masterbuilt 560? Visit here.
-Dive into the comparison: Masterbuilt 560 vs. 800 vs. 1050.
-Uncover the cleaning techniques for Masterbuilt Gravity 560, 800, and 1050.
-Compare the Masterbuilt Gravity Series: 1050 vs. 560.
Masterbuilt 560 Mods (Different Methods)
Mod 1: Firebox Upgrade
Starting with the firebox, here’s a step-by-step guide based on my experience with the Masterbuilt 560 firebox mod:
- Begin by removing the screws.
- Take off the hopper cover.
- Detach the wire.
- Unscrew the upper hopper and set the screws aside.
- If there’s rust, gently tap the firebox wall with a hammer to remove it.
- Slide in the top half of the new firebox.
- Ensure the section that allows heat and smoke to pass is facing downward.
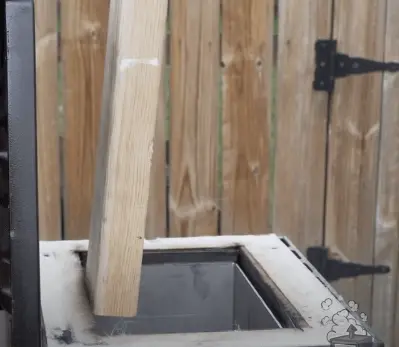
- Place a piece of lumber on the firebox and tap it with a hammer for a snug fit.
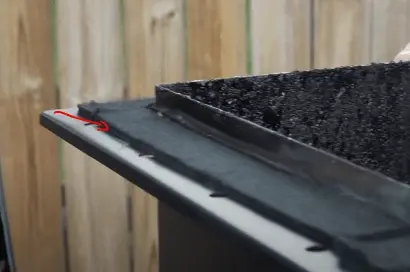
- Before reassembling the upper hopper, seal the firebox lip with a gasket.
- Once the firebox is securely installed, piece all the components back together.
- If desired, you can also install this mod in a brand-new grill.
For the specific product I used, check out the link here….
Mod 2: Vent Modifications for Air Control
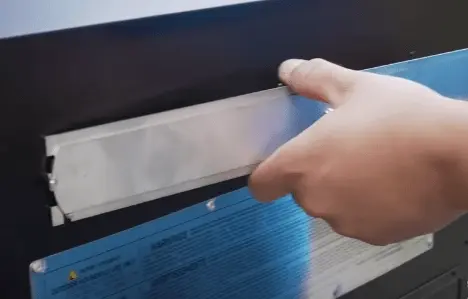
Making adjustments to the vent can significantly impact air control in your Masterbuilt. Here’s my step-by-step guide to tackle the Masterbuilt 560 vent mods:
- Note that the vent damper comes with 4 tabs: 2 on the left, 1 in the middle, and 1 on the right.
- Start by inserting the left side and slide it into position. The best part? No drilling required.
- Position the piece slightly elevated, ensuring the bottom tab remains lifted.
- Then, secure the right side in place by pushing it down.
- Conveniently, you can fine-tune the vent’s position using just your finger to meet your specific needs..
Incase you are looking for Masterbuilt 1050 Mods? Check Here .
Mod 3: Water Pan Modifications
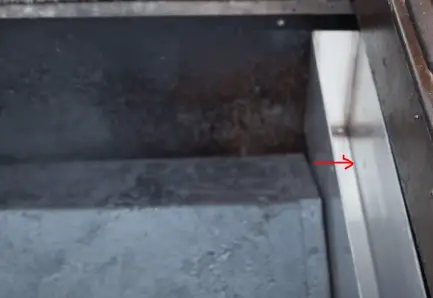
When it comes to vent dampers, the options are plentiful. But let me share a recommendation based on my personal experience with Masterbuilt 560 water pan mods:
- I highly recommend this specific damper for its lightweight design, compact size, and the bonus: no drilling necessary..
- It’s a slender water pan, perfectly designed to fit between the manifold and the firebox.
- If you need to increase the water level in the pan, a large syringe works wonders.
- This allows you to conveniently add water without even opening the grill.
Mod 4: Manifold Cover/Drip Pan
Maintaining cleanliness in your grill can enhance its lifespan. Here’s how I’ve managed the grease using the Masterbuilt 560 manifold modification:
- Always ensure your cover is secured over the manifold.
- This specific manifold cover boasts an anti-flare lip, designed to effortlessly collect grease.
- If you prefer not using the cover as a drip pan, simply attach two brackets to the manifold.
- Place a drip pan on top of the brackets, and you have a dedicated space to collect fats and grime..

Mod 5: Masterbuilt Charcoal Grate Modification
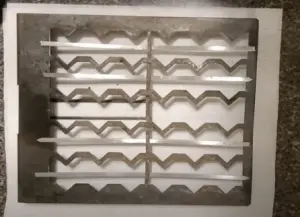
Improving the charcoal grate can enhance your grilling experience. Based on my experiments with the Masterbuilt charcoal grate mod, here’s a step-by-step guide:
- Carefully remove the grate from the firebox.
- Clean it thoroughly and lay it on a clean surface.
- Measure the skewers according to the grate’s width and make the necessary cuts.
- Insert each skewer into the gaps provided.
- Remember, the skewer should be threaded from the underside of the central iron..
Mod 6: Masterbuilt 560 Griddle Shroud Modification
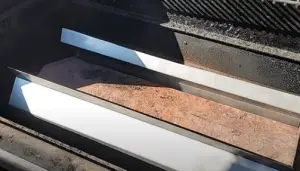
The griddle is a game-changer, channeling heat directly upwards and beneath, enabling you to perfectly cook or smoke delicacies like steak and burgers. For those keen on enhancing this feature, I’d recommend the 560 Griddle Shroud. Here’s how to install it:
- Start by removing the top two grates from your grill.
- Next, take off your manifold cover.
- Finally, position the griddle shroud over the manifold.
Incase you are looking for Masterbuilt 1050 Mods? Check Here .
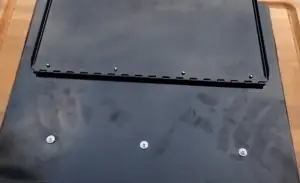
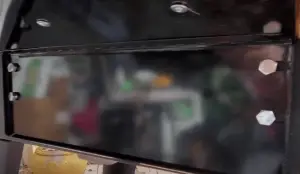
Mod 7: Masterbuilt 560 Front Shelf Enhancement
Equipment:
Steps :
- Trim the cutting board to match the dimensions of the tray..
- Apply a good quality sealer to the cutting board for longevity.
- Connect the board and tray using three half-inch screws.
- Secure with four screws right beneath the Masterbuilt nameplate.
- Finally, attach the tray just below the Masterbuilt plate.
# Discover a Variety of Masterbuilt 560 Accessories Right Here.
Enhance your grilling experience with these must-have accessories for your Masterbuilt 560:
- Powder-Coated Steel Font-Shelf for 560 Digital Charcoal Grill and Smoker.
- Cover: Protect your grill from the elements.
- Rotisserie Kit: Perfect for even roasting and grilling.
- Meat Probe: Monitor your meat’s internal temperature with precision.
- Extreme Heat Resistant BBQ Gloves: Safeguard your hands during intense grilling sessions.
- Fish & Vegetable Smoking Mat: Ideal for smoking delicate items without them falling through the grates.
- Fire Starter: Get your grill going with ease.
- Warming Racks: Keep your dishes warm while the rest of your food cooks.
- Meat Thermometers: Ensure your meats are cooked to perfection every time.
- Hopper Lid/Door Switch: An essential for maintaining consistent cooking temperatures.
# LSS Masterbuilt 560 Modification Kit.
Looking to upgrade your Masterbuilt 560? The LSS-Mods kit might be just what you need.
Included in the Kit:
- Firebox Liner: Enhance the durability and performance of your firebox.
- Water Pan: Improve moisture control while cooking.
- Vent Damper: Achieve better airflow and temperature regulation.
- Griddle Shroud: Optimize heat distribution for even cooking.
- Manifold Cover: Efficiently manage grease and reduce flare-ups.
For a comprehensive modification experience, please check out LSS-Mods…
# Frequently Asked Questions About Masterbuilt 560
# How Long Does Masterbuilt 560 Last?
Based on its current hopper capacity, the Masterbuilt 560 typically lasts between 12 to 15 hours.
# Can I Use Pellets in a Masterbuilt Gravity Smoker?
Absolutely! You can use pellets combined with wood chunks in your Masterbuilt Gravity Smoker for a richer flavor profile..
# How Do I Turn Off My Masterbuilt 560?
Turning off your Masterbuilt 560 is simple. Here’s my step-by-step guide:
- Press the power button to turn it off..
- Insert two slides or dividers. These act to cut off all airflow to the charcoal, ensuring it goes out.
- Lastly, disconnect the power supply for safety.
# How Do I Start My Masterbuilt 560?
Getting your Masterbuilt 560 up and running is straightforward. Here’s my guide:
- Pour charcoal into the hopper.
- Ignite it using a starter and lighter.
- Close both the hopper lid and the ash pan door.
- Remove the two slides.
- Set the temperature to 225°F and let the magic begin.
# How Do I Preseason My Masterbuilt 560?
Preseasoning your Masterbuilt 560 ensures optimal performance and flavor. Follow these steps:
- Load the hopper with charcoal or lump, then ignite with a starter. Allow it to burn for a minute or two.
- Press the controller’s start button and set the temperature to 250°F.
- Close the hopper lid and the firebox door. This prompts the fan to ramp up the temperature.
- After 60 minutes, adjust the temperature to 400°F for 30 minutes.
- Turn off the power, insert the two slides, and then use a cloth soaked in cooking oil to rub the smoker’s interior and its grates.
- Restart the grill at 400°F for another 30 minutes, remove the slides, and then shut it down.
# Why Does My Masterbuilt 560 Display ‘Open’?
If your Masterbuilt 560 displays an ‘open’ message, it’s likely due to an issue with the switch. This error commonly arises when the switch’s contact points become wet or accumulate grease. Ensure these points are clean and dry.
# Can I Use Wood Chunks in My Masterbuilt 560?
Certainly! Wood chunks enhance the smoky flavor. According to Masterbuilt:
- You can mix wood chunks with charcoal in the hopper..
- However, ensure you don’t use more than 1.5 pounds of charcoal if you intend to mix in wood chunks.
- Place the wood chunks in both the hopper and the ash container for a richer taste.
# Conclusion
For dedicated grillers, these Masterbuilt 560 modifications are a must-have addition. With these adjustments, you can better regulate temperature, maximize fuel efficiency, and increase your cooking options. With the help of these crucial tweaks, up your grilling game and discover new flavor possibilities. Enjoy a better grilling experience than ever before when you upgrade your Masterbuilt 560. Don’t pass up on these revolutionary changes that will transform your outdoor cooking experiences…

